This post serves as a sort of guide to help people build the microphone in this video by DIY Perks, as well as to show how I built mine.
Firstly, do not expect to be able to build it for £30-£40 as stated in the video unless you already have many of the components or you cut cost by removing unnessarsary parts or using cheaper materials. If you live outside of Europe or America you will likely have to pay a large amount of shipping, and if you live in the USA after the Trump tariffs, you will pay a large tariff on many components.
If you dont care about looks, my first recommendation is to build it using a cheap premade mic arm (you can buy one on ebay for as little as £8) and attach the preamp to the back of the microphone frame.
Second, if your device has a 3.5mm audio jack you can remove the USB ADC and USB-C port, instead using a regular 3.5mm audio cable. To do this connect the GND and OUT pins on the preamp board to a 3.5mm headphone jack. You will still need to run a USB cable for 5v, or you could use a spare 5v power supply. This wont affect sound quality but will reduce cost if you are unable to get the USB ADC cheaply.
Third, you can use a potentiometer instead of a rotary switch for the gain control. This saves you from having to buy the rotary switch and all those resistors.
Lastly, you can save a lot of money by using a different material for the frame, I used aluminium but you could use stainess steel or even 3D print it. Note that you cannot solder to a lot of metals (such as aluminium) so you will need to find a different way to assemble it. I used adhesive but if you care about how it looks, you could use screws instead.
Sourcing Parts
When sourcing electronic components I recommend Farnell. I also recommend buying two of the NMA0515SC and THAT1512 as they can easily be fried if you accidentally short the board. When buying resistors, get the 0.5W variant.
You can source metal fairly easily on eBay, same for things like premade mic arms.
Tools
The bare minimum tools you need to build the microphone are:
- Soldering Iron (with a holder and sponge)
- Flush cutters
- Needle nose pliers
- Hacksaw
- Multimeter
RF Interference
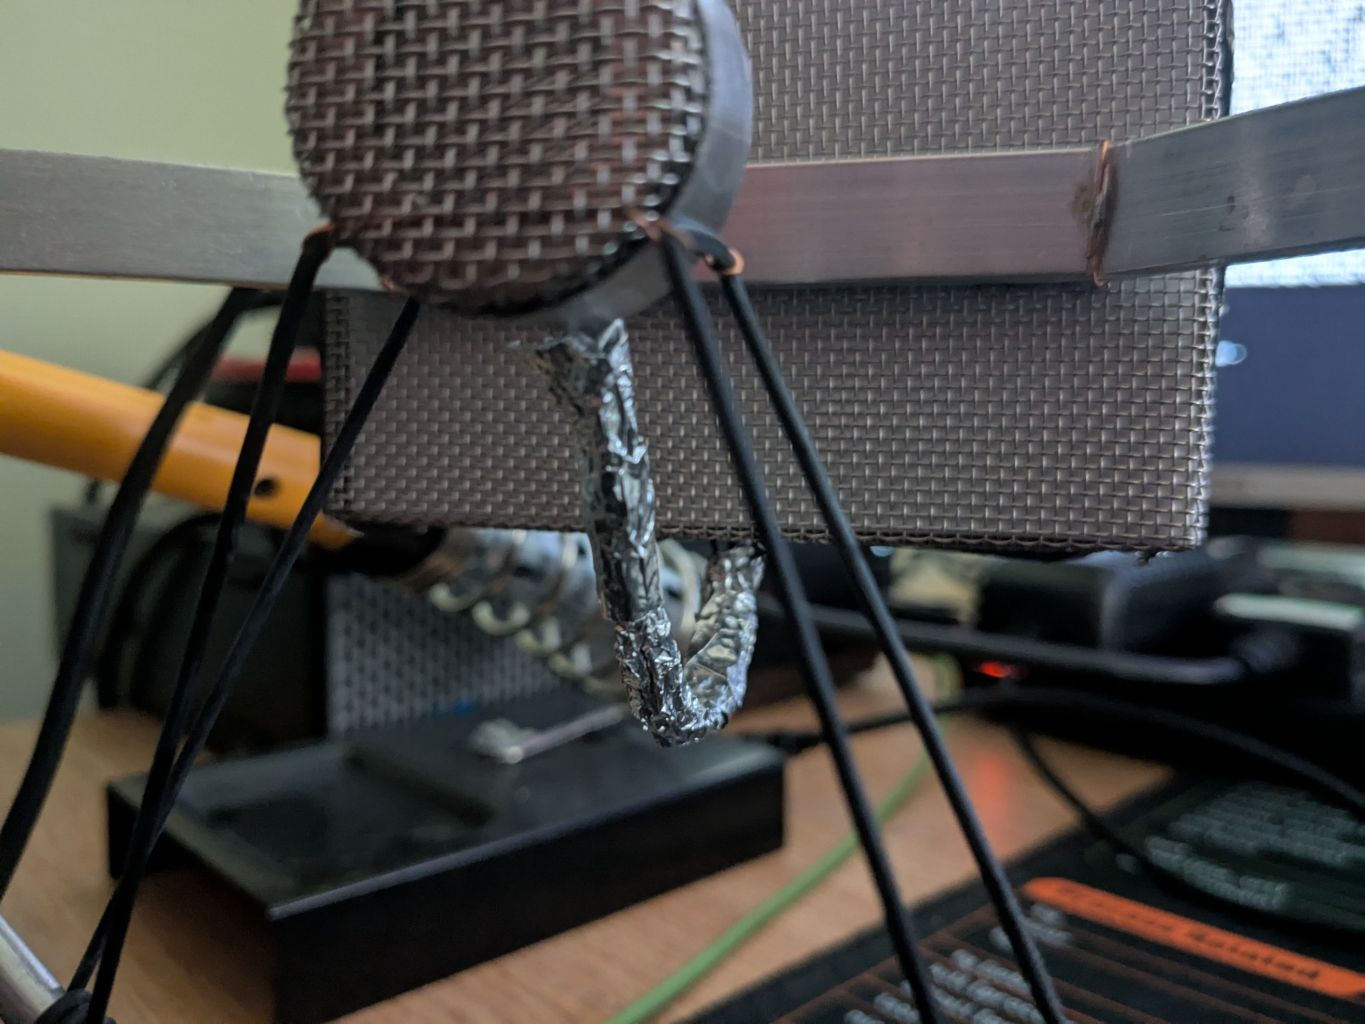
The preamp board is very sensetive to RF interference, if you do not properly shield all the electronics from RF you will hear a "whining/buzzing" sound on the output. This is because the wire going between the preamp and microphone capsule acts as an antenna. The easiest way to shield from RF interference is using wire mesh connected to ground. If you are having issues with RF interference, the easiest way to debug it is using aluminium foil.
In the video Matt uses solder braid to shield the wire between the mic capsule and the frame, however most solder braid cannot be opened up. I just wrapped the wire with aluminium foil, but I would suggest using proper shielded wire instead.
Troubleshooting
If the microphone does not work on the first try (it almost never will), try these steps:
Check the traces are cut under the THAT1512, if they have not been cut it will usually fry the THAT1512 and NMA0515SC.
Check the voltages on the NMA0515SC, the input should be 5V, the output should be +15V and -15V. Touch the NMA0515SC and THAT1512, if they are burning hot, they are fried.
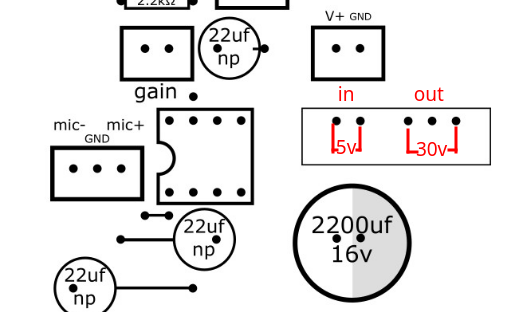
Try touching the mic+ and mic- pins on the input with your finger, you should hear some static if the preamp board is working. If you hear static but the mic capsule is not picking up audio, check the JFET is not shorted to the casing of the mic capsule, also check the JFET is connected properly.
If it still isnt working, join the DIY Perks discord and ask in the microphones channel.
My Build
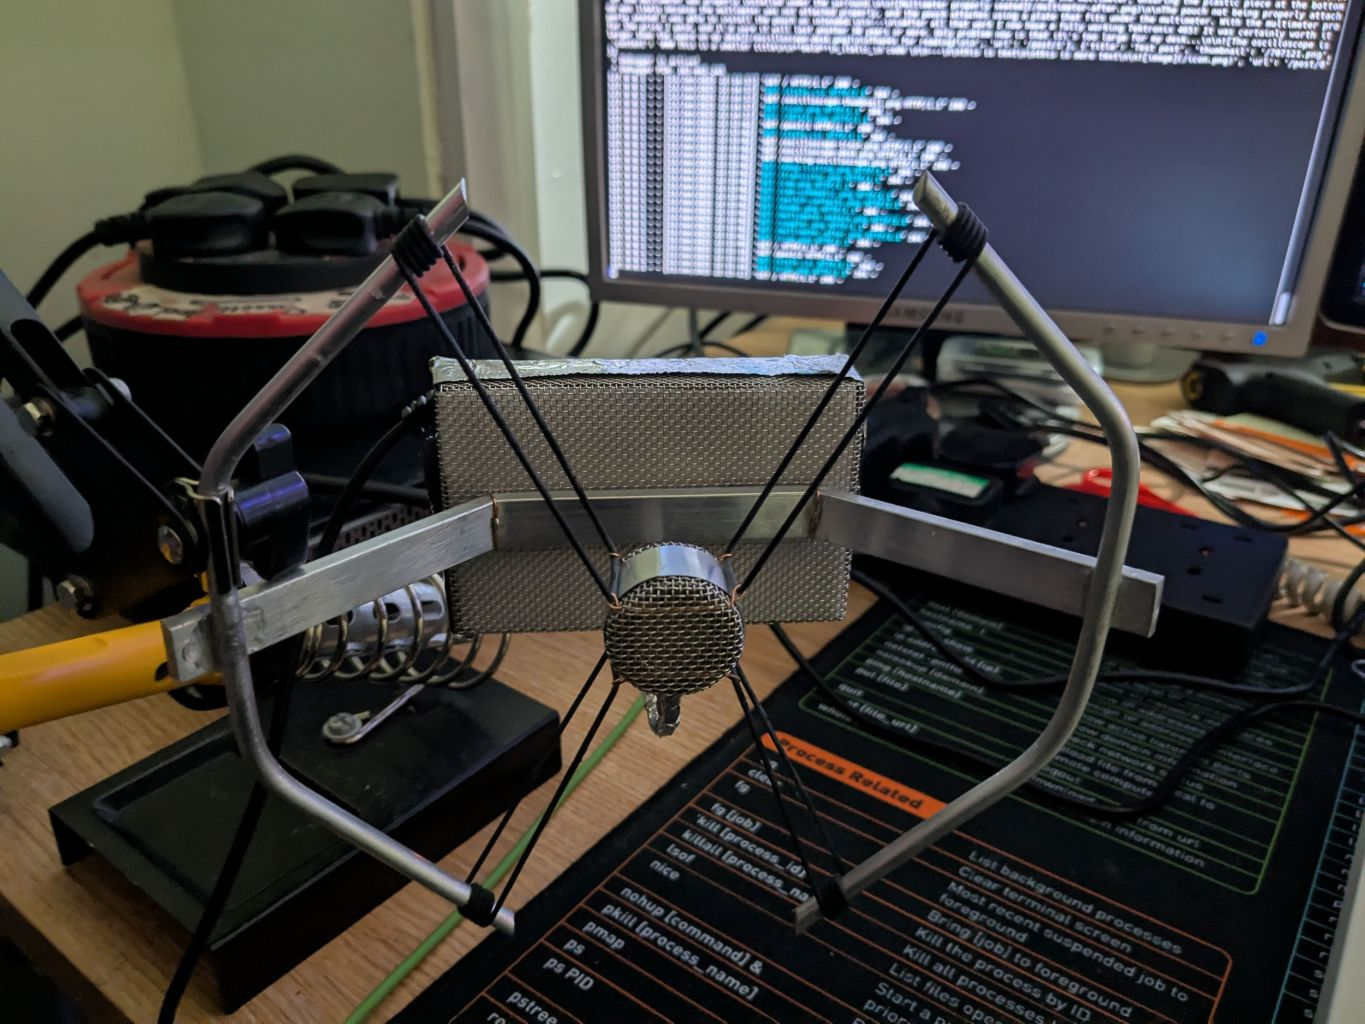
I built my mic for the sound quality, it looks jank but it sounds great. I saved cost by using cheaper metal and a premade mic arm. I used aluminium foil for RF shielding